Step 1
Log in to your server using the headquarters username and password

Note that each institution using Survey Solutions will utilize their
own server. Consequently, your username can differ from the one depicted
above.
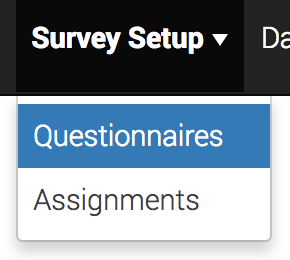
Step 2
Select the Survey Setup tab, and click on Questionnaires.
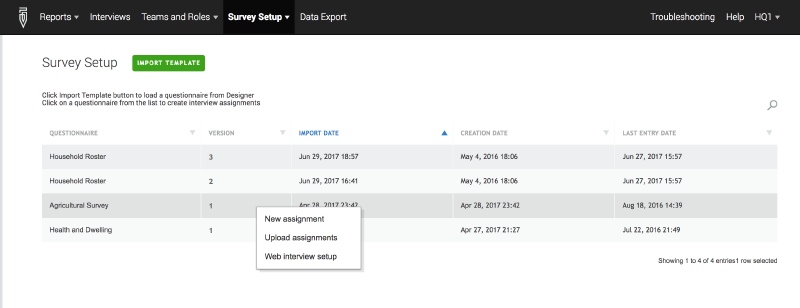
Step 3
Create the new assignment for your questionnaire.
Click on the questionnaire template you want to create a new assignment
for, and then click on New Assignments from the pop-up menu.
Step 4
Fill out as many identifying fields as you would like. You do not need
to fill out all the identifying fields. Interviewers will be able to
fill out any identifying fields left blank so you may want to leave
identifying field blank if you think the Interviewer would be able to
more accurately fill out that information.
Step 6
Specify the quantity for the assignment. The quantity is the maximum
number of interviews that can be generated for that assignment. For
example, if you want your interviewer to perform 5 interviews for the
assignment, you would put ‘5’ in the Quantity field. To specify an
unlimited number of interviews for that assignment (previously known as
census mode), leave the Quantity field empty. The quantity can be
changed later if you want to increase or decrease the number of
interviews.
Step 7
Specify who will be responsible for the assignment. Select the
supervisor or interviewer that will be responsible for the assignment.
The field allows you to search for the supervisor or interviewer by
their username.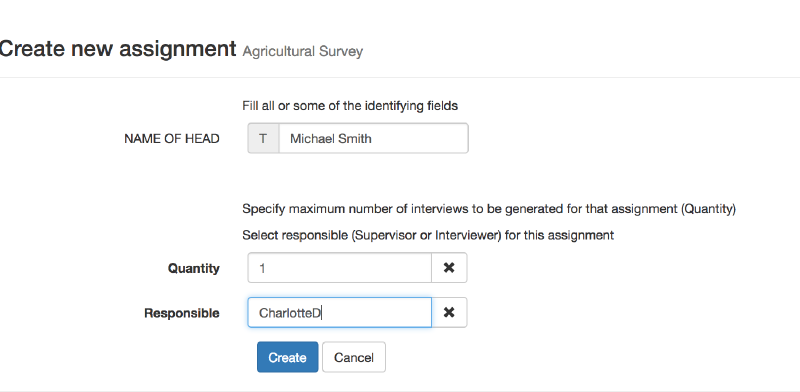
Step 8
Click on the blue Create button to generate the assignment. After creating the assignment, you will be taken to the Assignments dashboard where you will see your newly generated assignment at the top of the list.